
The metal piece attaches to each of the two forks to prevent them from moving with respect to each other. Unfortunately, this metal piece can flex if placed under heavy stress.
Revised 12-10-2011
An aftermarket fork brace is a worthwhile addition for the 1981-1982 Silverwing, both Interstate and non-Interstate versions. Without one front end wobble can be experienced on occasion. Although I'm not aware of any mishaps resulting from this condition, it can be very unnerving if not expected.
A rigid fork brace came standard on the Silverwing in 1983 so an aftermarket fork brace is not applicable for that year model.
The Problem
This is a photo of the underside of a well-used GL500 front fender.
The metal piece attaches to each of the two forks to prevent them from moving
with respect to each other. Unfortunately, this metal piece can flex if placed
under heavy stress.
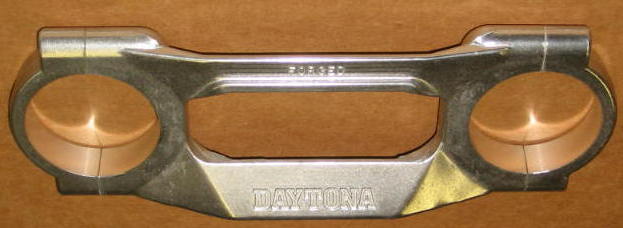
The Daytona Fork Brace
The Daytona Fork Brace was an aftermarket solution to the problem back in the day. They are fairly rare now but occasionally one will show up on eBay or a parts bike.
This is the Daytona Fork brace Model 15684.
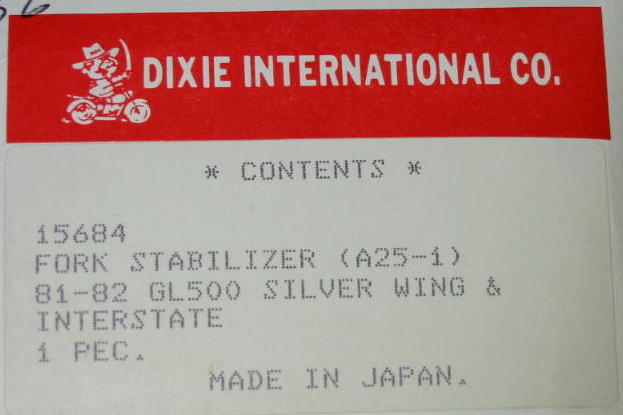
This is the label from the box it came in.
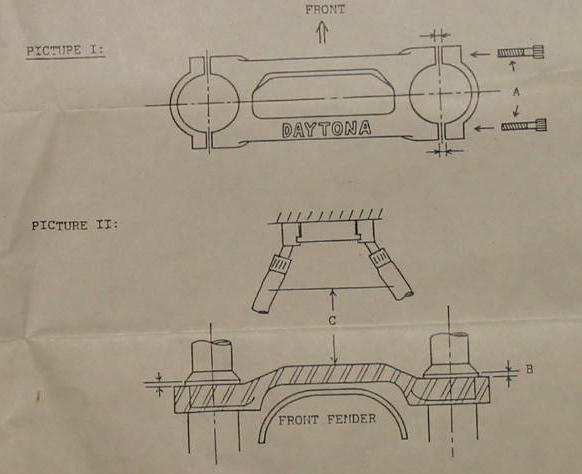
This is a copy of the installation instructions.
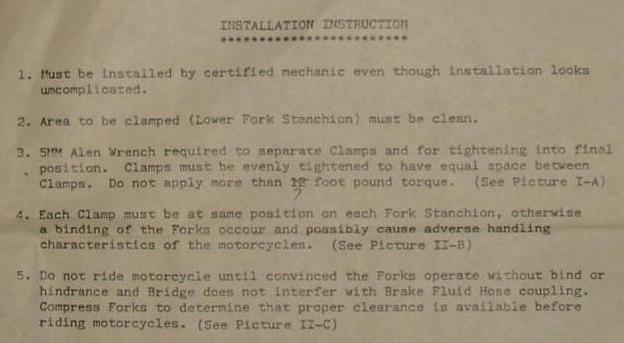
Note the torque specification was reduced to 7 lb-ft. It's likely the
manufacturer may have had reports of problems with stripped threads.
This is another one installed on a 1982 GL500I. Additional screws have been
added to the top of this version of the brace to allow for minor variations in
the distance between the forks.
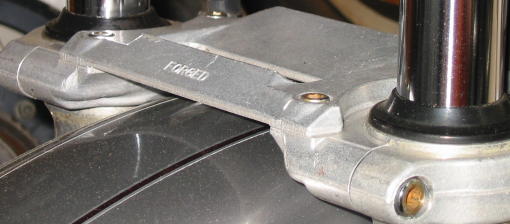
I noticed the brake hoses could rub against the rear of the fork brace. A
short piece of scrap hose was cut, split, and attached with wire ties to
provide some protection.

The Tarozzi Fork Brace
Another source for GL500 aftermarket fork braces has recently become available, this one from Italy. I ordered and installed one.
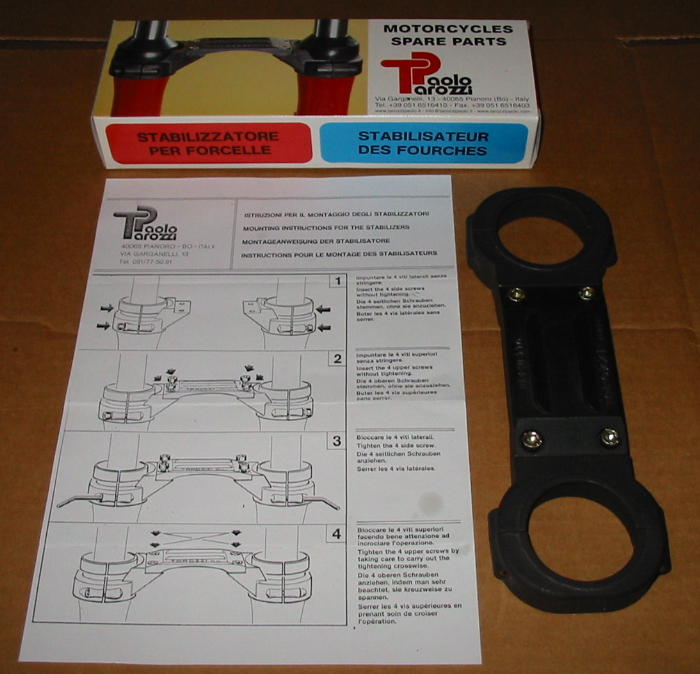
This shows the fork brace, the instruction sheet, and the box it came in. For
the GL500 and GL500I, the correct model number is 22-0027.
This is another view of the instruction sheet.
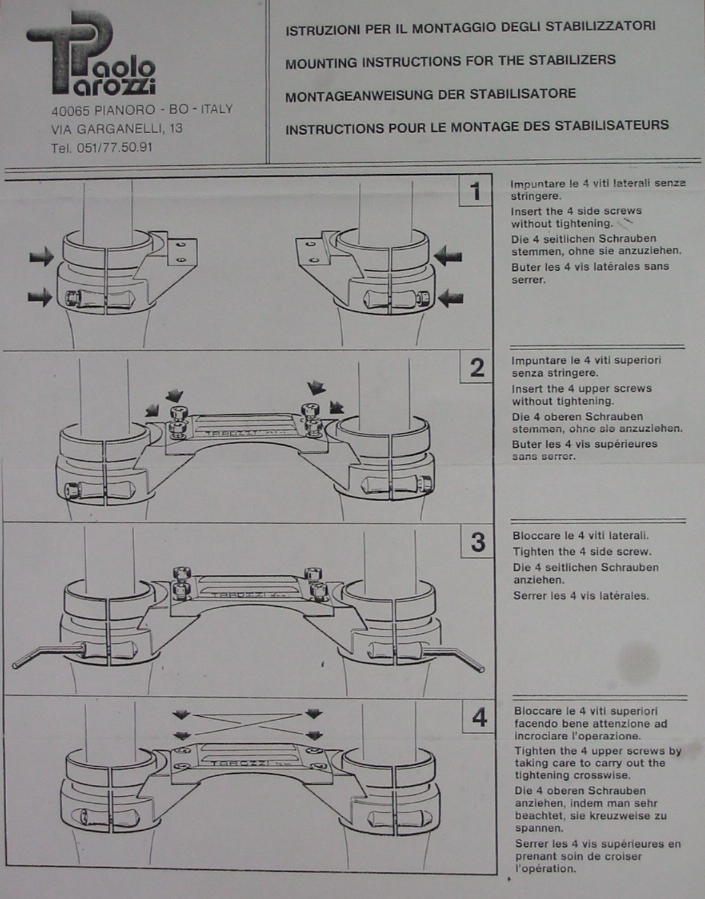
There are no torque specifications given for the screws, but 7 lb-ft is a
reasonable value.
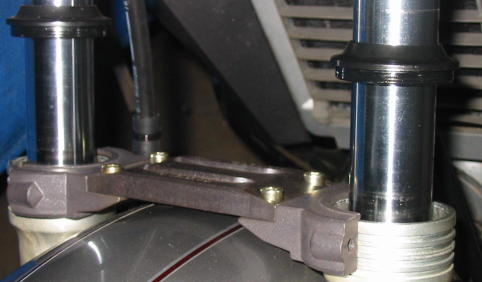
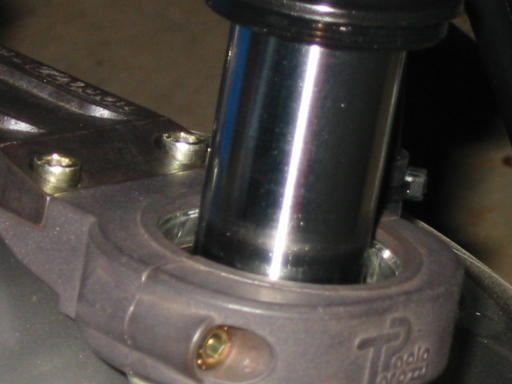
Here are a couple of close-up shots of the Tarozzi fork brace.
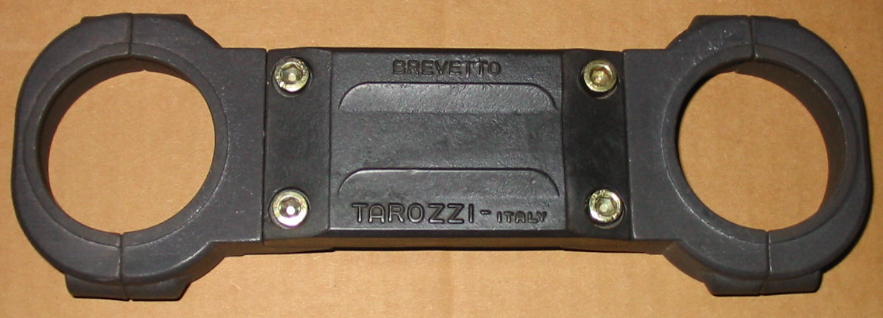

Note the inner lip. It is designed to rest on top of the lower fork housing.
Also note the small void spot on the inner wall - this is not a defect; it is a
residue left over from the casting process.
To install the fork brace, both fork dust seals should first be lifted up
out of the way. This step is omitted in the printed instructions.

Then the main fork brace body is set in place with the ends removed. The
screws should all be loose at this time.
Next, the two end caps are installed. The four end screws are tightened
first, followed by the four top screws in a criss-cross pattern as indicated in
the instructions. I used a torque wrench set to 7 lb-ft to ensure they were
tight enough to be secure but not so tight that there was a risk of stripping
the threads.
Finally, the fork dust seals were pressed back down into place.
The installation is now complete.

One potential problem exists with this installation method. The fork dust seals can come loose and ride up the fork tubes. One method of dealing with the problem is to use adhesive to retain the fork dust seals in place.
Alternately, the fork brace can be installed over the dust seals as
shown in this photo in accordance with the printed instructions.

Installation of this part was fast and very easy. Highly recommended.
The Tarozzi fork brace can be ordered from
Fast from the Past. Their contact
information is:
Fast from the Past, Inc.
9519 Jackson Trail
PO Box 606
Hoschton, GA 30548
Phone 770-614-0968
Email
jimhinshaw@fastfromthepast.com
Disclaimer: I have no affiliation or interest with this manufacturer and vendor other than as a satisfied customer.